Hey guys, let’s cut to the chase – if you’re reading this, chances are you’re either a sysadmin buried in server racks, a tech sourcing SCSI cables for a fresh build, or maybe even someone who stumbled here because their old SCSI link keeps crapping out mid-batch transfer. For context: I’ve been running a small SCSI cable supplier for 7 years, so I’ve dealt with every wonky cable under the sun – from the ones that look fine but drop 40% of data, to the cheapos that fray after 6 months. Testing a SCSI cable isn’t rocket science, but skip a step, and you’re staring at a production halt that’ll cost you way more than a good cable ever will. Let’s break this down the way I teach our new warehouse techs, no corporate fluff. SCSI Cable

First off, let’s get one thing straight: SCSI isn’t like USB-C or HDMI. It’s a old-school, parallel interface – think of it as a 1990s data highway with multiple lanes instead of a single paved road. That means it’s finicky about length, shielding, pin alignment, and even how tight you screw those terminators. A lot of folks skip the basic visual check, and that’s where 80% of bad cable issues start. I’ve had a customer send back a cable that “didn’t work” only to find they bent a tiny ground pin on the connector – not a flaw in the cable, just careless handling. So visual test is non-negotiable, first step.
What exactly are we looking for here? Grab your cable and hold it up to good light. SCSI connectors have two main types, usually: 50-pin (for older narrow SCSI) and 68-pin/80-pin (for wide or ultra SCSI, like Ultra320). Check every pin in both the host-side and device-side connectors – no bends, no breaks, no tiny shavings of metal stuck in the holes. If a pin is even slightly bent, you can try gently straightening it with a small flathead screwdriver (just don’t push too hard, they snap easily). Next, the shielding: SCSI relies on that braided metal mesh around the cable to block EMI – electromagnetic interference from server fans, power cables, whatever. If that mesh is frayed, torn, or peeled back anywhere along the length, that’s a problem. I’ve tested frayed shielding cables that worked on a test bench but crapped out in a live rack because the fan two feet away was screwing with the signal. Also, check the strain relief – that thick plastic/rubber boot where the connector meets the cable. If it’s cracked or the internal cord is exposed, that’s a sign of long-term wear, even if it looks fine right now. For our cables, we seal the strain relief with hot melt adhesive during assembly, so that boot should be solid, no gaps.
Okay, visual check passed. Now we move to the functional tests, because looks can be deceiving. Let’s start with the simplest live test, no extra gear needed. Plug one end into your SCSI host adapter (that’s the card in your server with the SCSI ports) and the other into your device – could be a hard drive, tape library, whatever. Fire up your server, check the BIOS or OS’s SCSI utility – for Linux, that’s usually lsscsi; for Windows, it’s Device Manager, look under SCSI and RAID controllers. If the device shows up immediately, great, move to the next step. If not, wiggle the cable gently while watching the utility – if the device pops in and out when you move it, there’s a intermittent connection. Don’t just move the connector; test along the whole length – sometimes a internal wire is broken and only connects when the cable is held at a certain angle. We’ve had a batch of cables where the internal solder joint was too weak, so a customer would say “half the time it works” – that’s exactly that. If you get an intermittent issue here, don’t just throw the cable away – it’s likely a manufacturing flaw, which is why we 100% test every cable before it leaves our warehouse.
But wait, the live test is good, but it only tells you if it works some of the time, not how well it performs. For that, you need a simple data transfer test. Grab a large file – I’m talking at least 1GB, smaller files won’t stress the SCSI link enough – and copy it between the two SCSI devices on opposite ends of your cable. Watch the transfer speed, and check for errors mid-copy. If you’re seeing checksum errors, or the transfer speed is way lower than the rated speed of your SCSI standard (Ultra320 should do ~320 MB/s, Ultra160 ~160 MB/s, etc.), that’s a red flag. Another trick: run a tool like dd on Linux or CrystalDiskMark on Windows to benchmark the transfer. I recommend running this test twice, just to be sure – sometimes one run gets a fluke, two runs with consistent low speed or errors means the cable is bad. For our SCSI cables, we run a 5GB transfer test on every one, so you won’t have to deal with those errors post-install.
Now, if you’re dealing with ultra-wide or high-speed SCSI (Ultra320 is the most common for enterprise these days), you need to do a termination check too. SCSI is a parallel bus, so if it’s not terminated properly, the signal bounces back like an echo on a highway – that causes errors, dropped connections, all that good stuff. How do you test termination? First, count your devices. A SCSI bus (whether internal or external) needs exactly two terminators: one at each end. If you have a device on the middle of the bus, that doesn’t get a terminator. If you have a SCSI cable connecting the host to a single device, that’s two ends – so one end needs a terminator (usually built into the host adapter or the last device on the chain). Wait, so how do you test if your cable’s ends are terminating correctly? There’s a simple multimeter test here – super cheap, you can pick one up at any hardware store for $10. Set the multimeter to continuity mode (that’s the beep mode). Touch one probe to the center pin of the connector, the other to the outer shield (the metal shell of the connector). If you get a beep, that means there’s a short – which is a bad thing, because that’s part of the termination circuit. If you don’t get a beep, check the other end of the cable – only one end should be continuous (that’s the terminator end). Both ends beeping? That’s a short in the cable, or you wired the terminator wrong – that’ll kill your SCSI link. We pre-terminate all our SCSI cables for single-device setups, so you don’t have to mess with this – just plug and play, basically.
I know some folks will say “what about the length?”, and that’s a good point – SCSI has strict length limits depending on the standard. Narrow SCSI (50-pin) is max 1.5 meters for internal, 3 meters for external. Wide SCSI (68/80-pin) is max 12 meters for external, internal is shorter. If your cable is longer than that, even if it looks perfect, it won’t work – signal degradation. That’s another reason to buy a cable from a reputable supplier – we don’t cut corners on cable length, we make sure every one meets the standard, not the minimum. I’ve had a customer who bought a cheap 10-meter cable from another vendor for their Ultra160 setup, and it kept dropping connections – turn out, they used a 15-meter cable but cut the end wrong, so it was actually too long for the standard. That’s avoidable if you get a cable from someone who knows SCSI, not just someone who sells cheap cables.
Wait, let’s talk about the testing gear you might not have, but it’s worth it if you’re in IT full-time. A SCSI cable tester, not the cheap ones, but a decent one like the ones we use in our warehouse – it’ll check pin continuity, signal strength, termination, and even identify if there’s a broken wire inside the cable. We use these because they save us time and make sure every cable that leaves our shop works as advertised. If you’re testing a lot of SCSI cables, like a sysadmin who manages 10 servers, it’s worth the $100-$150 for a basic tester – way cheaper than the downtime a bad cable causes.
Let’s wrap this up with the most common mistakes I see: folks skip the visual check, skip the transfer test, and skip the termination check. A few months back, a small business owner came to us because their server was down for 3 days, costing them $2k in lost sales. They’d bought a bunch of cheap cables from a big box store, and none of them worked properly. We tested their old cables – half had bent pins, one had frayed shielding, another had a bad termination circuit. We sold them our pre-tested cables, had them installed in an hour, and they were back up. That’s the thing with SCSI: it’s old, but it’s still reliable when it’s done right. Cheap cables are a false economy – you might save $5 now, but you’ll pay way more later.
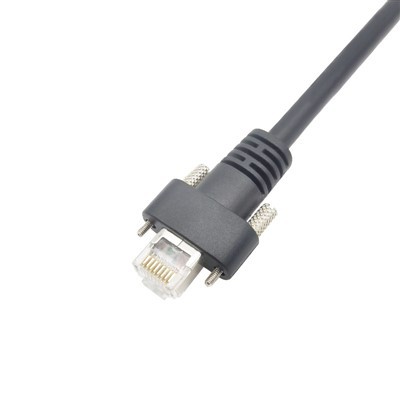
If you’re in the market for reliable SCSI cables, no cut corners, no guesswork – just good, tested cables that work the first time. Hit us up to chat about your specific setup, whether you need internal 50-pin for old storage, external Ultra320 for a tape library, whatever. We don’t do mass-produced garbage, we’ve been in the game long enough to know what works, and every single cable leaves our shop tested twice to make sure it’s ready for your racks.
IEEE1394 Cable References
- ANSI Small Computer System Interface (SCSI) Parallel Architecture and Signaling Standard, X3T9.2/1385-D, 1997.
- CompTIA A+ Core 2 Exam Objectives, Domain 3: Hardware, Section 3.4: Storage Device Installation and Configuration, 2022.
- SCSI Cable Testing Guidelines, Storage Networking Industry Association (SNIA), 2019.
Karobert Technology LLC Karobert Trading PTE. LTD.
We’re known as one of the most professional scsi cable manufacturers and suppliers in China, also support customized service. Please feel free to buy high quality scsi cable made in China here from our factory. For price consultation, contact us.
Address: 6250 S 196th St, Kent, WA, 98055, USA.
E-mail: karl@karobert-us.com
WebSite: https://www.karobert-us.com/
